Build Thread Bench Racing Exercice On Building a 223 Performance Or Turbo Engine

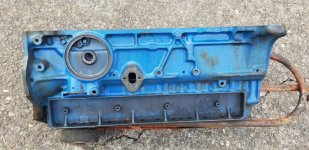
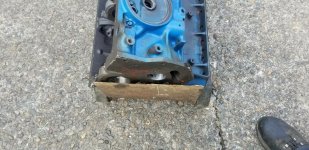
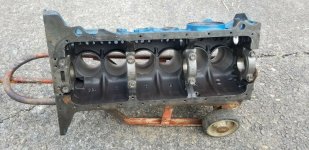
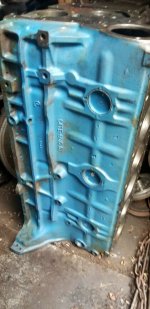
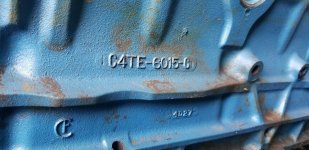
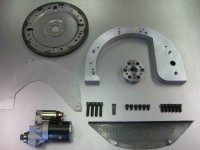
I will be wanting to use some kind a later Trans like a C6, C4, PG, or something else I know there is a C4 and GM adapter plate that are being made, but I think if this ends up going more to a race only build I would like to build one myself. That way it could also be used as a full block plate to mount the rear of the engine into the chassis, plus it could be used to adapt one of the newer Mini PMGR gear drive starters too (like are used on an FE or SBF engines), so one part doing severial different jobs, and I then could make a matching front engine mounting plate to. The trans is going to back up a 1954 to 1964 223 six or a 1961 to 1964 262 Ford basically they are all the same externally. So far I don't have a 223 or 262 engine core yet to measure but been looking in the locale area a little. As of this week end Sept. 17, 21 I did locate a 1961 up 223 its a complete engine located over in the SoCal area, the asking price is a bit high for a core motor but it is a complete running engine.

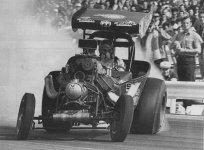
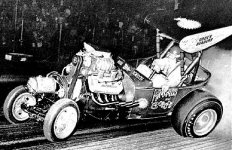
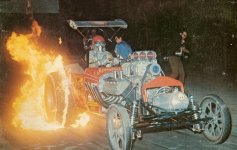
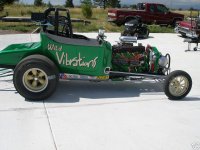
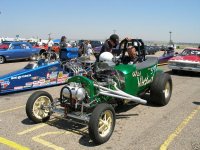
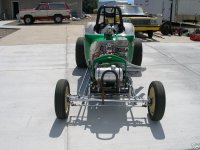
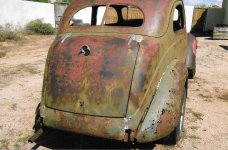
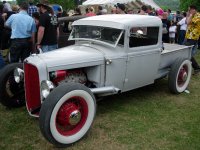
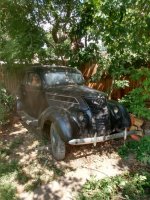
Not sure on what body and chassis that I will use there are so many of the Older Fords that I like its just finding something that fits into my very low budget most of those could be a dual purpose street & race car or Pickup. I have also been wanting to build another Model T for a few years now so might lean in that direction of a light weight tube chassis with a T body. I liked the the old Street Roadster Class's & Altered'es from the 1960's and 1970's
 
As promised, here's a data sheet for the 223/262 that I received from Clifford decades ago. In fact, if memory serves me correctly, I talked to Jack himself at the time.

Lou Manglass
 

Attachments

  • Clifford Data Sheet.pdf
    1.8 MB · Views: 43
Thank you very much Lou, that's a very interesting data sheet, yes I am sure that back then you would have been talking direct with Jack Clifford.
 
If memory serves me correctly, we had a specific discussion about putting a 262 crankshaft in a 223. I believe that's the reason for the "hybrid" data sheet.

Lou Manglass
 
Yes it's really great info on your data sheet. I used to have a couple of his old early parts catalogs too (Clifford Reseach?). His catalogs were loaded with info back then I think the 262 crank swap was talked about, but that's been many years ago now and most of that kind stuff disappeared somtime ago. Robert
 
Thank you Firepower354, have been trying to find out what the 223 and 262 six'es block deck height is to know how long of an aftermarket connecting Rod can be used with a custom forged piston.
I’m hoping to get you that figure soon, I still don’t have the engine out of the truck yet, the shop it’s at is backed up, another thought instead of a turbo to keep that old skool look, with my 223 build I decided to keep it NA but originally had the thought of a roots blower like the guys at Aussie speed do maybe a dyers 471 or similar. Are the 262 and 223 intakes the same? That custom one on Johns 262 in that HAMB thread looks easy enough to have various tops that could bolt on or could even modify a cliffords intake for a blower!
 
Yes as far as I know the intake manafolds port layout would be the same for both the 223 and 262 six heads. His intake is very nice design kind of a Mini / Short Ram design that is something like what the Trans Am or Road Race cars used. I believe that Johns Bonavile truck uses a 223 head on his 262 block and he had also talked about also using a 223 crankshaft in the 262 block too.
 
Awhile back I found out about this inexpensive way to use Electrolysis to clean every bit of rust, crude, grease, paint, and other deposits inside and out on blocks, heads and other parts. Below is a short video on how it, works. I am planning to use this method to clean up all the engine and any other steel or iron parts.

In the past I once used Chem Strip to clean a 1946 Cad Sedan body that I was restoring and later on an engine (its fairly pricey) it really works great at getting rid of all the rust but because of the expensive chemicals they use they want the parts to be free of grease and oil before they will put it in their tanks.

Bubba- Great video. Electrolysis is an amazing part of nature. I learned about it quickly when I got into the commercial shrimping business. Salt water is very conductive, and the metals that were "sacrificial" would be eaten away amazingly quickly when attached to, or had an electric circuit with iron. Bronze driveshaft and wheel (propeller) one did not want bubbling away! (28' X 3" diameter shaft, 50" 5 blade wheel behind an Allison 4.5:1 reduction trans, behind an 8V-71 Detroit.) During the annual dry-dock haul out zink was attached to any sacrificial metals, (steel rudder, steel keel struts, etc) and it would dissolve first. Every year at pullout, about 20 pounds of zink had been consumed. That video is ligitimate, I would recommend this procedure. Use lowest amp setting and (obviously) DC current. The item to be cleaned must have the negative side of the circuit. 12 V is fine. Higher amps can cause pitting of the cleaner metal, before the greasy areas get dissolved. Here's a tip I haven't seen here, and it works: put a small zink in the radiator, and the internal water jackets will remain rust free, until the zink is consumed. In automotive applications a single piece of zink lasts for several years. An antifreeze tester will show perfect electrolyte balance for years. Had one truck (simi, 3406 Cat) with 650,000 miles since an antifreeze change. Still green, clean and tested at 100% balanced.
 
I realize this thread is about 223 turbo build, so I hope I didn't err with the previous post.
 
I realize this thread is about 223 turbo build, so I hope I didn't err with the previous post.
No its all good Frank info like that from real experiences is very helpful and useful. I used to work on heavy construction equipment and big trucks you learn many things when your responsible for keeping a fleet in good working condition, even worked on several Ski Boats but nothing that ever went in saltwater. Thank you
 
Bubba I just saw this thread today and I'm saying. Hell yeah! I wanna see this project work. I still have a spare 223 in peices if you need anything measured. I am really itching to stick a 471 on it. I talked to Schneider and they recommended keeping the 264F but widening the LSA to 114 to keep cylinder pressure from bleeding off and wasting your boost. I have a blower cam in my closet that's ready for my 2nd build.


I haven't switched to head studs yet on my other 223, but I still have a bit of coolant leak around the head. I'd recommend o-ringing the block and just being done with it. I've got to take mine apart this winter to chase down a coolant leak....I think my water pump isn't very happy about being spun fast.
 
Hi GalaxieInline, it's good to hear from you and am glad to hear that you still are wanting to do a blown 223 build! Yes could use some info as I don't currently have any 223 or 262 blocks or parts to measure. Most of my old files on these engines are on a couple of my old computers this week I just got one of them back up running but there is still a few problems with it Windows 7 Pro other is much older hope can find some of the info on them though. Could use the deck height measurement to figure out what custom length aftermarket connecting rod can be used along with a custom forged piston. Ideally this would be from the center-line of the main bearing saddles to the top of the block deck, but might work just putting like a carpenters square or some other straight edge in the blocks centered top of the main saddles and measure from that, would also need the bearing thickness the crankshafts main diameter and cranks Rod throw size and the rods big end measurement (which I think I might have found some on the two different rods thanks to pmuller9 and others). Another measurement that would be helpful is the total engine lenght front to back so I know about how much room I will need to fit an engine in a chassis. You might be able to cut down the water pump impellers some or every other one so its not pushing the coolant so fast.
 
Thanks to Paps61, he found a listing with a few pictures of a hard to find 1964 262 Six Truck Block. These 262's were a Truck only engine that were mostly used in the bigger Ford Trucks F500 up from 1961 to 1964 they had the fuel pump mounted on the front timing cover. There were also some used in the smaller pickups including the F100 only in 1964. This one has a block Design / Casting Number of C4TE-6015-C. Notice that this block has a Fuel Pump mounting location on the side of the block like a 223 so this maybe one of the 1964 blocks that was used in one of the F100, F250, and F350 lighter duty pickups. As an example a 223 Block would have a C4AE-6015- Design / Casting number, the 1961 up blocks (C1AE-6015 for a 223 Six Block, or C1TE-6015 for a 262 Six Block) the later blocks had a slightly improved oiling system so that is what i will be wanting to find for this build up.
 

Attachments

  • 1964 Ford 262 Block1.jpg
    1964 Ford 262 Block1.jpg
    356 KB · Views: 3
  • 1964 Ford 262 Block2.jpg
    1964 Ford 262 Block2.jpg
    340.5 KB · Views: 2
  • 1964 Ford 262 Block3.jpg
    1964 Ford 262 Block3.jpg
    349.6 KB · Views: 2
  • 1964 Ford 262 Block4.jpg
    1964 Ford 262 Block4.jpg
    197.3 KB · Views: 3
  • 1964 Ford 262 Block5.jpg
    1964 Ford 262 Block5.jpg
    311 KB · Views: 2
Last edited:
Next is some interesting Piston Ring Tech that another site member had posted over in the Big Ford Six forum.


Quote from [arse_sidewards]“Saw this from Summit's youtube channel


Anyone have experience with ported rings? Worth it or snake oil?”
 
The first three pictures are of Wild Willie Borch & The Winged Express AA Fuel Altered this is a car that was and is local to the area I grew up in it was lots of fun watching Wild Willie Drive its a big reason that I like these type cars so much, its going to be lots of the inspiration for this build. Next three pictures is much like what I was thinking of and this 23 T that even has a Chevy 292 Six in it. Seen this 1937 Ford Sedan a rolling body for sale in my locale area its a little rough but is fixable. I kind of like the body lines of these slant backs price is low too. I also like The Early Coupes from 1920's on up the last picture is also of a 1937 Ford Coupe like this one they will usually cost much more money out of reach of my budget unless can find a deal on a rough rolling body.
 

Attachments

  • The Winged Express AA Fuel Altered & Wild Willie Borch 1.jpg
    The Winged Express AA Fuel Altered & Wild Willie Borch 1.jpg
    82.4 KB · Views: 2
  • The Winged Express AA Fuel Altered & Wild Willie Borch 2.jpg
    The Winged Express AA Fuel Altered & Wild Willie Borch 2.jpg
    42.4 KB · Views: 2
  • The Winged Express AA Fuel Altered & Wild Willie Borch 3.jpg
    The Winged Express AA Fuel Altered & Wild Willie Borch 3.jpg
    289.3 KB · Views: 2
  • Ford 23 T Altered 292 6 Cly 3.jpg
    Ford 23 T Altered 292 6 Cly 3.jpg
    81.1 KB · Views: 3
  • Ford 23 T Altered 292 6 Cly 12.jpg
    Ford 23 T Altered 292 6 Cly 12.jpg
    120.3 KB · Views: 3
  • Ford 23 T Altered 292 6 Cly 4.jpg
    Ford 23 T Altered 292 6 Cly 4.jpg
    81.9 KB · Views: 3
  • 1937 Ford Tudor Sedan 2.jpg
    1937 Ford Tudor Sedan 2.jpg
    183.7 KB · Views: 2
  • 1937 Ford Tudor Sedan 3.jpg
    1937 Ford Tudor Sedan 3.jpg
    176.7 KB · Views: 2
  • 0411.jpg
    0411.jpg
    78.4 KB · Views: 2
  • 1937 Ford Coupe 1.jpg
    1937 Ford Coupe 1.jpg
    133.7 KB · Views: 2
Last edited:
I am planning to build a full block plate Trans Adapter that way it can be one part doing several jobs, below is one of the Adapter kits made for a 223 should fit a 262 and probably the 215 six too.

This TRANSMISSION ADAPTER KIT will allow for adapting Ford 223 6-cylinder Engines to Ford AOD Automatic Transmissions - i.e. - 6R80, AOD-E, 4R70W (wide ratio AOD-E) and 4R75, or Ford E4OD and 4R100

*
See Pictures above for Kit Installation Instructions.

Materials Included:​

(1) Adapter Plate - Ford 223 inline-6 to AOD
(1) Crank Adapter - Ford 223 inline-6 or 239 "Y" block to Ford AOD
(1) Flex Plate
(1) Starter – Long Gear
(1) Block Plate - Ford 223 inline-6 to Ford AOD
(1) Inspection Cover - Ford (most)
(4) SHCS 7/16-14 x 1-3/4
(6) SHCS 7/16-20 x 1
(6) 7/16-20 x 3/4 flex plate bolts
(2) HCS 1/4-20 x 1/2
(2) FLAT WASHER 1/4
(2) LOCK WASHER 1/4
(2) SHCS 1/4-28 x 1-3/4 (Starter Bolts)
(5) HCS 7/16-14 x 2

*Matching our adapter kits with your engine can be tricky. If you are unsure of which kit to purchase for your engine, please contact us through our website. Speed Gems is not responsible for return shipping costs of mismatched kits.

Speed Gems Transmission Adapters are machined right here in the U.S.A.!
 

Attachments

  • Ford 223 & 262 Six AOD Transmission Adapter Kit 1.jpg
    Ford 223 & 262 Six AOD Transmission Adapter Kit 1.jpg
    45.1 KB · Views: 3
  • Ford 223 & 262 Six AOD Transmission Adapter Kit 2.png
    Ford 223 & 262 Six AOD Transmission Adapter Kit 2.png
    662.8 KB · Views: 3
  • Ford 223 & 262 Six AOD Transmission Adapter Kit 3.png
    Ford 223 & 262 Six AOD Transmission Adapter Kit 3.png
    228.2 KB · Views: 3
  • Ford 223 & 262 Six AOD Transmission Adapter Kit 4.png
    Ford 223 & 262 Six AOD Transmission Adapter Kit 4.png
    448.5 KB · Views: 2
Could use the deck height measurement to figure out what custom length aftermarket connecting rod can be used along with a custom forged piston. Ideally this would be from the center-line of the main bearing saddles to the top of the block deck, but might work just putting like a carpenters square or some other straight edge in the blocks centered top of the main saddles and measure from that
If you just measure from the top of the main bore to the deck and add 1/2 of the main bore diameter would be fine.

Also the width of the connecting rod's big end or the width of the crankshaft's rod journal. Either one will work.
 
Back
Top