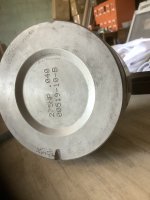
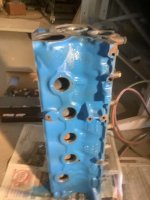
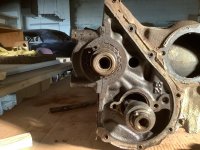
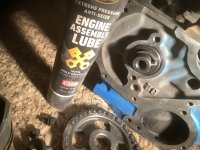
So I have my 1968 200 six machined and ready to rebuild. New piston set, head rebuilt, new timing chain, new gaskets, freeze plugs, etc. I have never done a complete rebuild and will tackle this best I can. I have some special assembly grease, and have all the spec such as torque setting from the tech archive. I have a manual from a 62 Ford falcon which may assist.
i assume I should first check the ring gap by getting a ring by itself in a cylinder and using a piston upside down slide in an inch and measure with a feeler gauge, right? Not certain I want to do this on all cylinders as I can be accident prone and will risk snapping a new ring in my set…that would suck, royally.
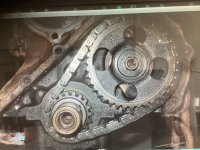
Then, assembly in this order: camshaft, pistons, crank, rod bearings, caps, timing chain and sprocket….then maybe sump oil pump, then rotate crank by hand and double check torque on main bearings, leave with number one piston TDC and gear/sprocket marks in alignment.
then I suppose lifters and push rods?
distributer inserted with contact facing valve cover, should give near approx timing.
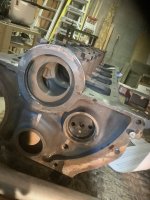
okay the I have to insert freeze plugs…do I use a lubricant….socket and hammer…drive them in…how far?
then flywheel on rear, head and miscellaneous like carburetor, starter, water pump, fan, coil, etc.
I am kind of rambling so not sure I have any readers at this point, but that is how my mind works.
I guess what I need is a shop manual of some sort..or some input. At least so I get the basics right.
I totally rebuilt my dagenham 4speed and it seems on the bench, aokay.
I will install new clutch and pilot bearing as I attach transmission.
My only real concern is I don’t make blunder.
one last question, I assume lightly oil all bolts prior to torquing. Which if any do you use threadlocker?
Andy
i assume I should first check the ring gap by getting a ring by itself in a cylinder and using a piston upside down slide in an inch and measure with a feeler gauge, right? Not certain I want to do this on all cylinders as I can be accident prone and will risk snapping a new ring in my set…that would suck, royally.
Then, assembly in this order: camshaft, pistons, crank, rod bearings, caps, timing chain and sprocket….then maybe sump oil pump, then rotate crank by hand and double check torque on main bearings, leave with number one piston TDC and gear/sprocket marks in alignment.
then I suppose lifters and push rods?
distributer inserted with contact facing valve cover, should give near approx timing.
okay the I have to insert freeze plugs…do I use a lubricant….socket and hammer…drive them in…how far?
then flywheel on rear, head and miscellaneous like carburetor, starter, water pump, fan, coil, etc.
I am kind of rambling so not sure I have any readers at this point, but that is how my mind works.
I guess what I need is a shop manual of some sort..or some input. At least so I get the basics right.
I totally rebuilt my dagenham 4speed and it seems on the bench, aokay.
I will install new clutch and pilot bearing as I attach transmission.
My only real concern is I don’t make blunder.
one last question, I assume lightly oil all bolts prior to torquing. Which if any do you use threadlocker?
Andy